 Pin it
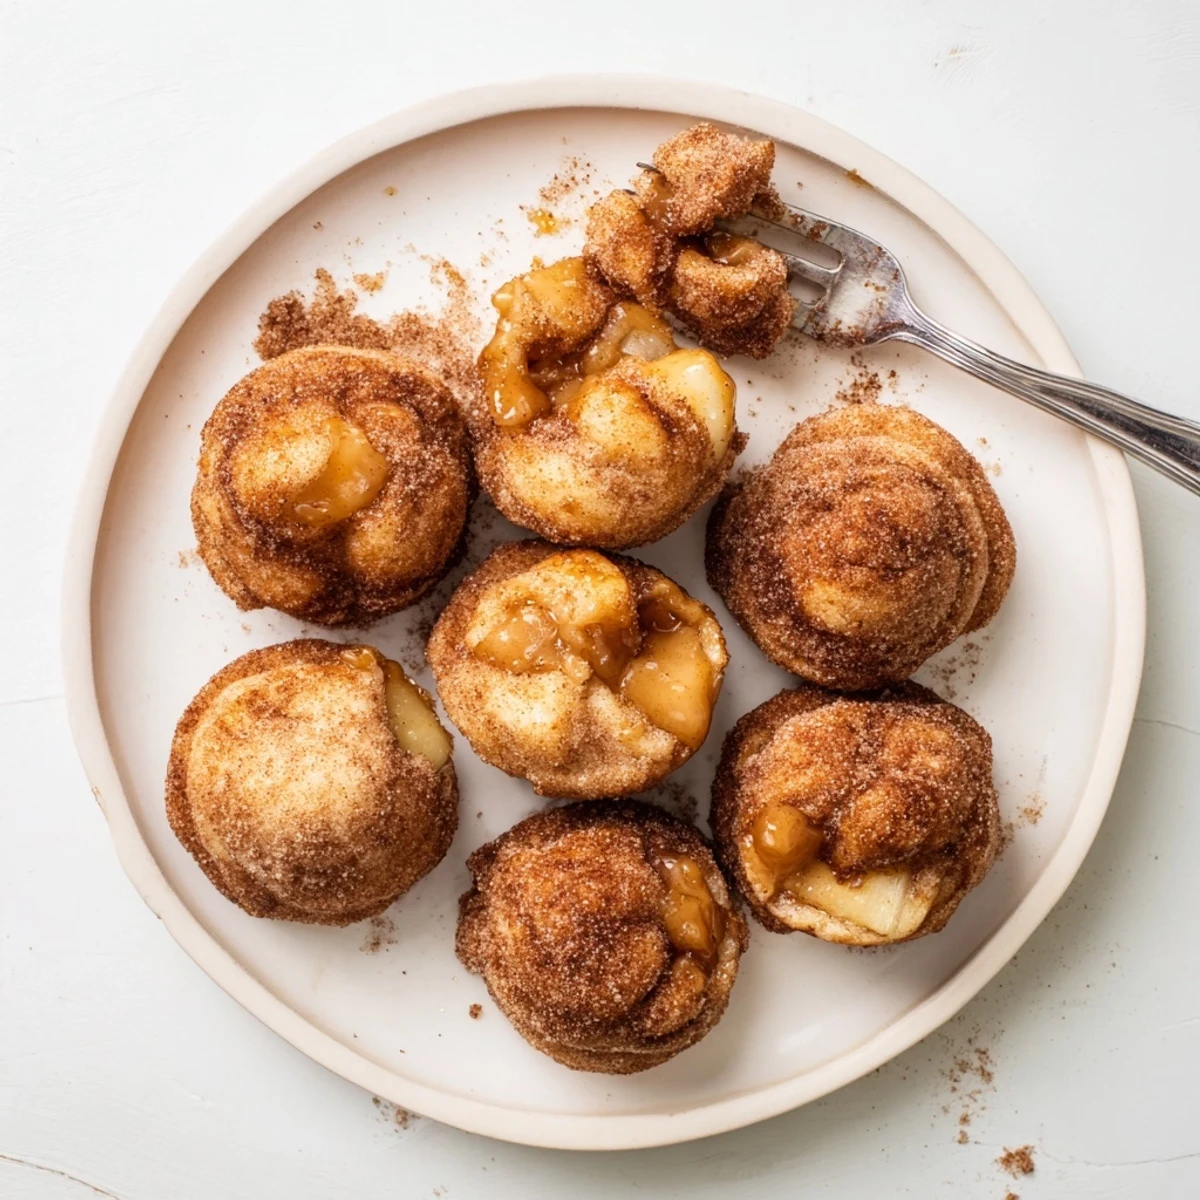
 These delightful caramel apple pie bombs transform simple refrigerated biscuit dough into an irresistible handheld dessert. Each golden parcel encases tender spiced apples and a melting caramel candy, creating a gooey center that oozes with every bite. The cinnamon-sugar coating adds a sweet crunch that perfectly complements the soft, buttery dough.
Ready in just 40 minutes, these treats bring the classic flavors of apple pie into a fun, poppable format. The apples are briefly caramelized with brown sugar and cinnamon before being wrapped in dough, ensuring maximum flavor in every bite. Perfect for parties, after-dinner treats, or weekend baking projects.
The first time I made these little apple pillows, my kitchen smelled like a fairground in autumn. I had half a can of biscuit dough leftover from breakfast and some apples that needed using. Within an hour, I had discovered what would become my go-to emergency dessert for unexpected guests.
Last winter, my sister dropped by unexpectedly on a rainy Sunday afternoon. I threw these together while we caught up at the kitchen island, and she ended up eating three straight from the baking sheet. Now she requests them every time she visits, calling them those little apple cloud things.
Ingredients
- 2 medium apples: Granny Smith or Honeycrisp hold their shape beautifully during cooking
- 2 tbsp unsalted butter: Creates that rich caramelized base for your apple filling
- 2 tbsp brown sugar: Adds moisture and deep molasses flavor to the apples
- 1 tsp ground cinnamon: The classic warming spice that makes everything taste like home
- Pinch of salt: Brightens all the flavors and prevents the sweetness from becoming cloying
- 12 soft caramel candies: These melt into gooey pockets of pure joy inside each bomb
- 1 can refrigerated biscuit dough: The shortcut that makes this recipe accessible for any weeknight
- 3 tbsp unsalted butter, melted: For brushing and helping the cinnamon sugar cling
- 1/3 cup granulated sugar: Creates that beautiful crispy exterior everyone loves
- 1 tsp ground cinnamon: The finishing touch that makes them irresistible
Instructions
- Preheat your oven:
- Heat to 350°F and line a baking sheet with parchment paper for easy cleanup
- Cook the apple filling:
- Melt 2 tablespoons butter in a small skillet over medium heat, then add diced apples, brown sugar, cinnamon, and salt, cooking for 4 to 5 minutes until tender and fragrant
- Prepare the dough:
- Separate biscuits and flatten each into a 4-inch circle on a lightly floured surface
- Fill each bomb:
- Place about 1 tablespoon of cooled apple mixture and one caramel candy in the center of each dough round
- Seal them up:
- Gather edges around filling and pinch tightly to seal, then place seam side down on your prepared baking sheet
- Add the coating:
- Brush each bomb with melted butter and generously sprinkle with cinnamon sugar mixture
- Bake to golden:
- Bake for 15 to 20 minutes until puffed and golden brown, with some caramel possibly bubbling through
 Pin it
 My daughter helped me make these for her school bake sale last fall. We stood side by side at the counter, her small fingers carefully sealing each little bundle. They sold out in ten minutes, and the moms were messaging me for the recipe before she even got home.
Dough Swaps
I have used pizza dough and crescent roll dough in a pinch, though biscuit dough remains my favorite for its fluffy, tender texture. The crescent rolls create a slightly more delicate, pastry like result that is equally delicious.
Serving Suggestions
These shine brightest when served warm, perhaps with a scoop of vanilla ice cream melting over the top. The contrast between hot, gooey interior and cold, creamy ice cream is absolutely worth the extra effort.
Make Ahead Wisdom
You can prepare the apple filling up to two days in advance and store it in the refrigerator. The bombs are best eaten the same day they are baked, but you can reheat leftover ones in a 300°F oven for 5 minutes to restore their warmth.
- Unbaked assembled bombs can be frozen for up to 2 weeks, then baked directly from frozen, adding 5 minutes to baking time
- If the caramel begins to leak during baking, simply let them cool for a few minutes before attempting to move them
- The coating sugar can be mixed in larger batches and stored in an airtight container for future batches
 Pin it
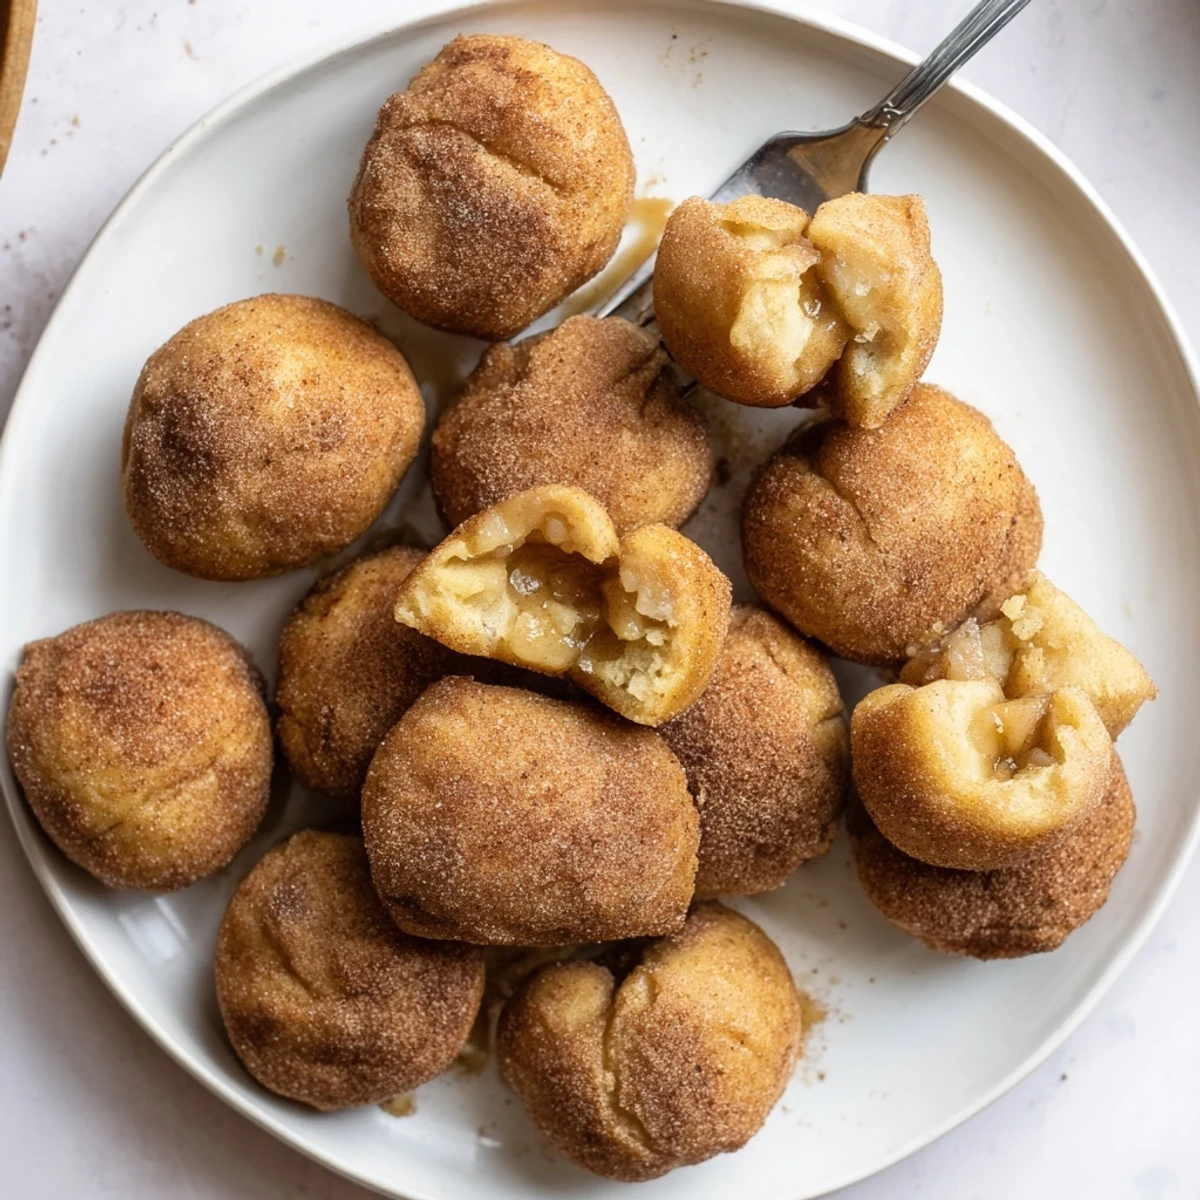
 There is something genuinely magical about biting into these warm, spiced bundles and finding that hidden pocket of melted caramel. They taste like childhood and comfort, wrapped up in a neat little package.
Recipe FAQ
- → What type of apples work best?
-
Granny Smith and Honeycrisp apples are ideal choices because they hold their shape during cooking and provide a nice tart contrast to the sweet caramel. Firm apples prevent the filling from becoming too mushy inside the dough.
- → Can I make these ahead of time?
-
You can assemble the unbombed pie bombs and refrigerate them for up to 24 hours before baking. For best results, bake fresh, as the dough may become soggy if stored too long. Reheat baked leftovers at 350°F for 5-7 minutes to restore crispiness.
- → What dough substitutes can I use?
-
Pizza dough and crescent roll dough both work beautifully as alternatives to biscuit dough. Pizza dough creates a chewier texture, while crescent rolls yield a lighter, flakier result. Adjust baking time slightly based on dough thickness.
- → How do I prevent caramel from leaking?
-
Ensure the dough edges are pinched tightly together, creating a complete seal around the filling. Place the bombs seam-side down on the baking sheet, and avoid overfilling. A small amount of leakage is normal and adds to the rustic appeal.
- → What toppings pair well with these?
-
Warm vanilla ice cream creates a classic hot-and-cold contrast. Additional caramel drizzle, whipped cream, or a dusting of powdered sugar enhance the sweetness. For added texture, chopped pecans or walnuts complement the soft dough and fruit filling.
- → Can I freeze unbaked pie bombs?
-
Yes, freeze assembled unbaked bombs on a baking sheet until firm, then transfer to a freezer bag for up to 3 months. Bake from frozen, adding 3-5 minutes to the cooking time. Do not thaw before baking for best texture.