 Pin it
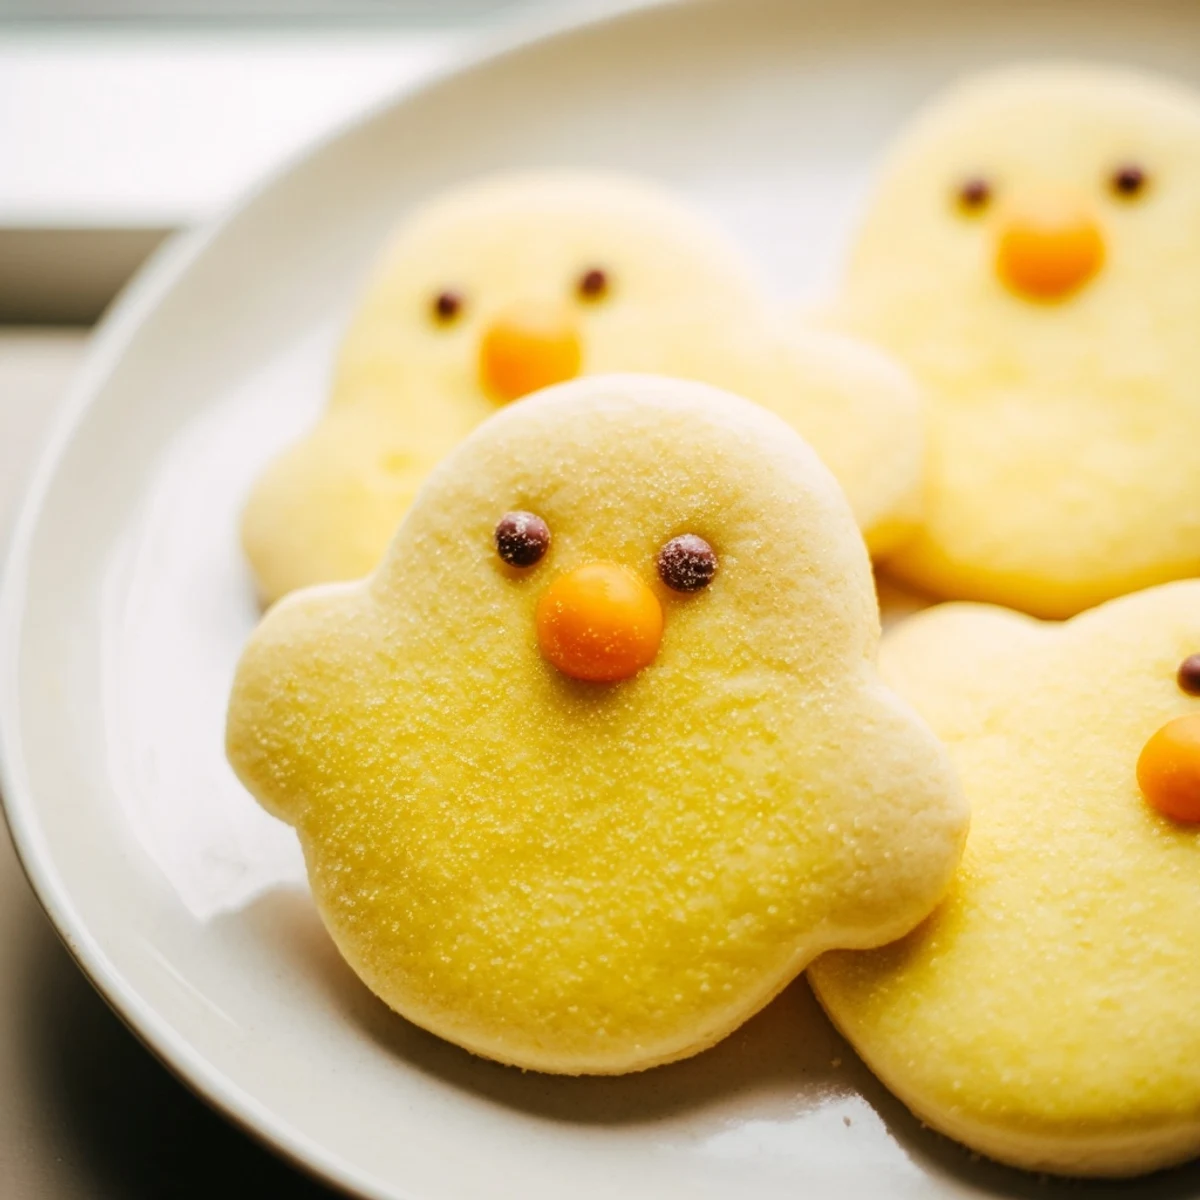
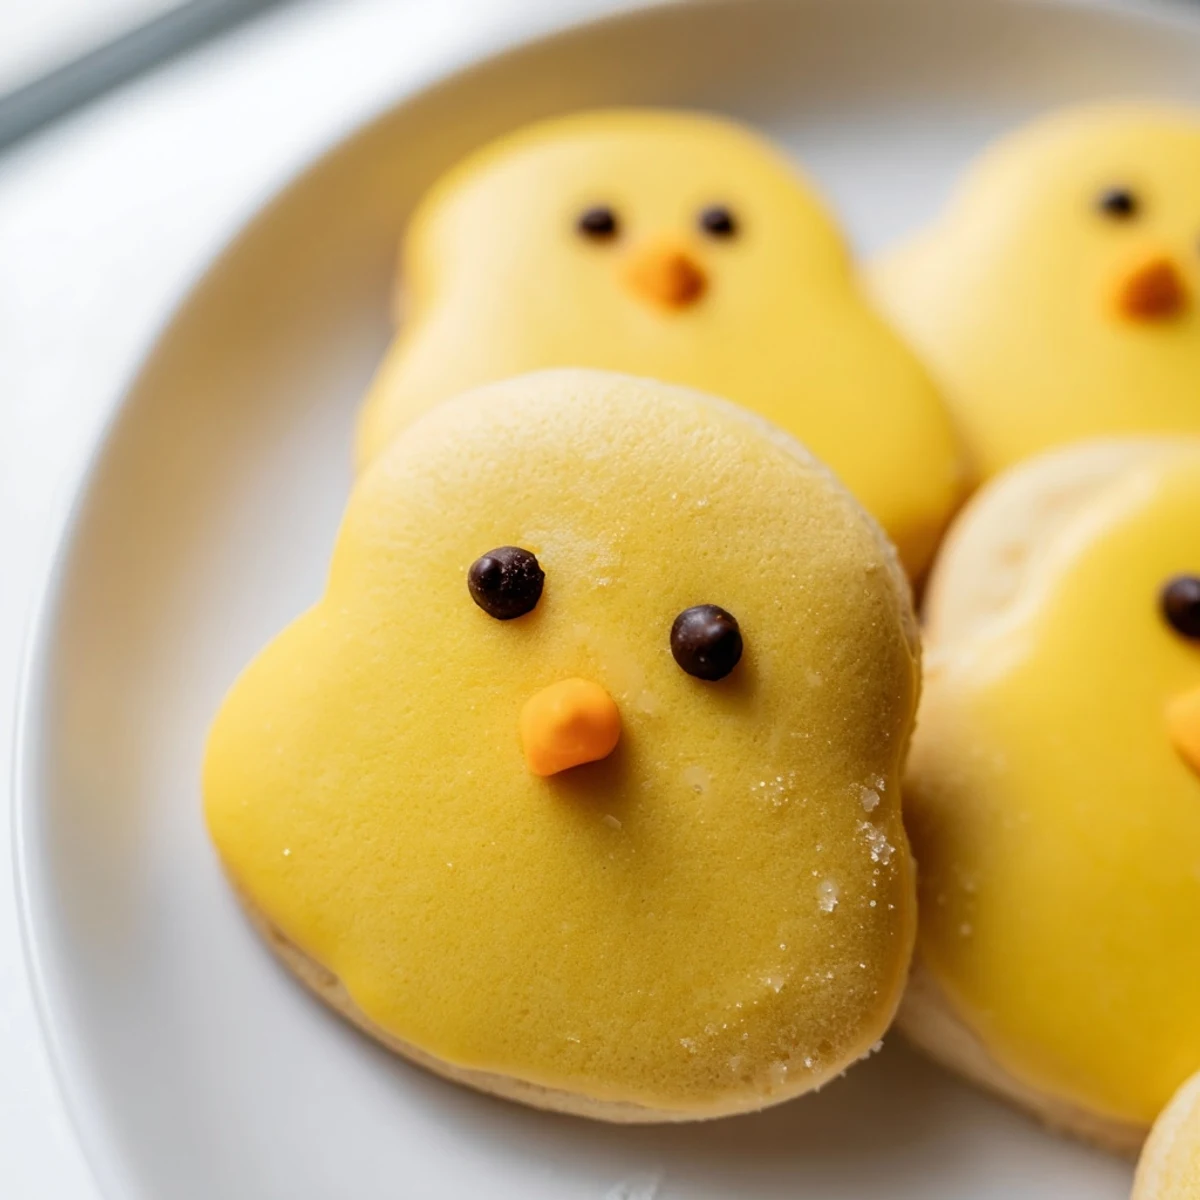
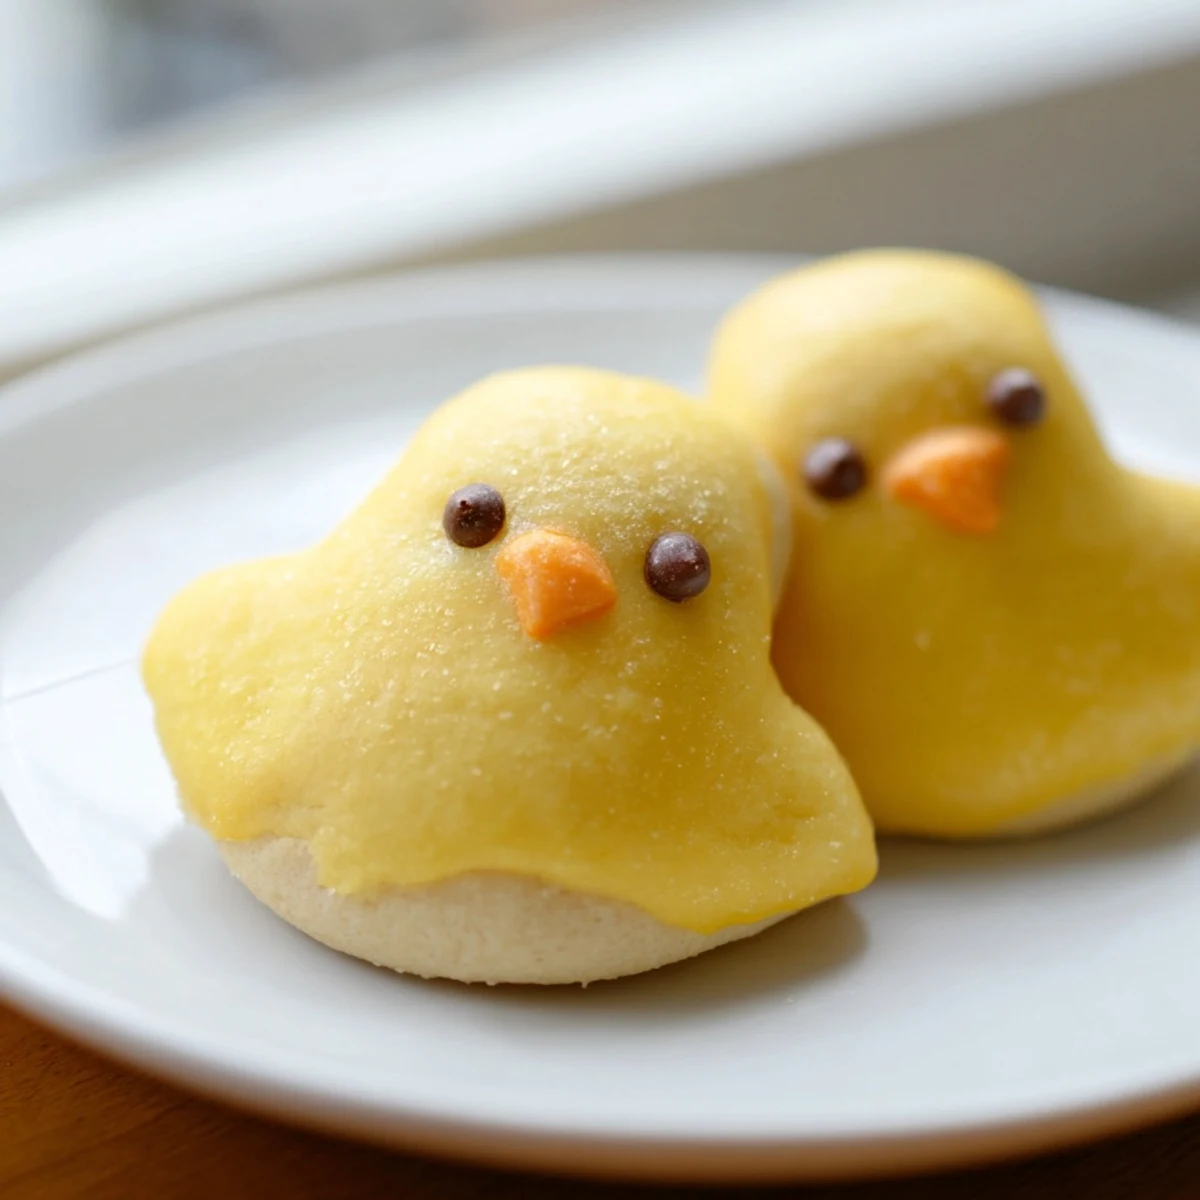
 These charming chick-shaped sugar cookies combine a classic buttery dough with vibrant yellow coloring and playful decoration. The cookie base features creamed butter and sugar for tender texture, while food coloring gives each chick its signature golden hue. After baking to light golden edges, the cookies receive their personality through simple glaze and adorable faces made with black eyes and orange beaks.
The decorating process invites creativity—use chocolate chips for eyes, candy for beaks, or experiment with sprinkles and colored sugars. Chill the dough briefly if it becomes too soft, or add lemon zest for bright citrus notes. The result is 24 crowd-pleasing treats that children and adults alike will find impossible to resist.
Last spring my niece asked if we could make something that looked like the baby birds in our yard, and suddenly I was knee-deep in yellow food coloring trying to figure out how to make cookie dough stand up like tiny feathery bodies. We ended up with flour on our noses and about three chicks that looked more like lopsided bunnies, but the giggles were absolutely worth the mess. Now every time spring rolls around, I get requests for these buttery little guys.
I brought a batch to my daughters classroom party, and watching twenty first graders carefully decide which chick they were going to eat was unexpectedly heartwarming. Two girls saved theirs on napkins to show their moms, and one little boy told me the yellow ones tasted more like sunshine than regular cookies. Sometimes the cutest cookies create the biggest memories.
Ingredients
- 2 1/4 cups all-purpose flour: The foundation that holds everything together, so measure accurately for the best texture
- 1/2 teaspoon baking powder: Gives these cookies just enough lift to stay tender without spreading too much
- 1/4 teaspoon salt: Balances the sweetness and lets the butter flavor really shine through
- 3/4 cup unsalted butter at room temperature: Use real butter and let it soften properly for that melt-in-your-mouth texture
- 3/4 cup granulated sugar: Sweetens the dough just enough without making the cookies cloying
- 1 large egg: Binds the dough and adds richness for a perfect cookie texture
- 1 teaspoon vanilla extract: Pure vanilla makes these taste like something from a proper bakery
- Yellow food coloring: Gel coloring works best for vibrant color without thinning the dough
- 3/4 cup powdered sugar: Creates a beautiful sheer glaze that makes the chicks look freshly hatched
- 2 tablespoons milk: Adjust this to get your glaze exactly the consistency you want
- Black decorating gel or mini chocolate chips: For eyes that give each chick its own personality
- Orange decorating gel or candy: The beaks that bring these little guys to life
Instructions
- Preheat and prep your baking space:
- Get your oven to 350°F and line two baking sheets with parchment paper so nothing sticks and cleanup is effortless
- Whisk the dry ingredients together:
- Combine the flour, baking powder, and salt in a bowl, whisking them thoroughly so everything is evenly distributed
- Cream the butter and sugar:
- Beat the butter and sugar until the mixture looks pale and fluffy, which usually takes about 2 to 3 minutes of serious mixing
- Add the egg and vanilla:
- Crack in the egg and pour in the vanilla, beating until the mixture looks smooth and glossy
- Work in the flour mixture:
- Gradually mix in the dry ingredients just until a cohesive dough forms, being careful not to overwork it
- Color the dough:
- Add yellow food coloring drop by drop, kneading until you have a cheerful, evenly colored yellow dough
- Shape the chick bodies:
- Roll dough into 1-inch balls, then create each chick by placing one ball for the body and a slightly smaller one on top for the head, pressing them gently together so they hold their shape
- Arrange on baking sheets:
- Space the cookies about 2 inches apart to give them room to bake evenly without merging into each other
- Bake until barely golden:
- Bake for 8 to 10 minutes, watching for the moment the edges turn just barely golden while the centers still look soft
- Cool completely before decorating:
- Let the cookies sit on the baking sheets for a few minutes, then move them to a wire rack until completely cool to the touch
- Glaze and add faces:
- Mix powdered sugar with milk until you have a smooth, thin glaze, brush it over the cooled cookies, then add eyes and beaks while the glaze is still slightly tacky so everything stays in place
 Pin it
 My mom keeps a batch of these in her freezer now, just in case grandchildren drop by unexpectedly. Theres something about pulling out a plate of cheerful yellow chicks that makes any ordinary afternoon feel like a tiny celebration.
Making Ahead
You can prepare the dough up to 3 days ahead and keep it wrapped tightly in the refrigerator, which actually makes it easier to work with when shaping time comes. The colored dough stays vibrant, and the flavors develop beautifully for a more complex cookie.
Decoration Ideas
Sometimes I add tiny sprinkle collars or use different colored sugars to give each chick its own style. Little ones love helping with this part, and their creative choices often turn out cuter than anything I could plan myself.
Serving Suggestions
These chicks are perfect alongside vanilla ice cream or as part of a larger spring dessert spread. I love packing them in clear bags tied with yellow ribbons for party favors that guests actually get excited about taking home.
- Pair them with coconut nests for a complete Easter theme
- Set up a decorating station at parties for interactive fun
- Make extra because they disappear faster than you expect
 Pin it
 Hope these little chicks bring as much joy to your kitchen as theyve brought to mine over the years. Happy baking, and may your spring be filled with plenty of sunshine and giggles.
Recipe FAQ
- → Can I make the chick cookie dough ahead of time?
-
Absolutely. Prepare the dough through step 5, wrap tightly in plastic, and refrigerate for up to 3 days. Let soften slightly at room temperature before shaping, as cold dough can crack. For longer storage, freeze the dough for up to 3 months and thaw overnight in the refrigerator.
- → What's the best way to get smooth yellow coloring throughout the dough?
-
Start with just 2-3 drops of yellow gel or liquid food coloring, then knead thoroughly to distribute. Add more gradually if needed—a little goes a long way. Gel coloring tends to produce more vibrant shades without adding extra moisture. The key is patience during kneading to ensure even distribution without streaks.
- → How do I prevent the chick heads from separating from the bodies during baking?
-
When attaching the smaller head ball to the body, press firmly but gently to meld the two pieces together. You can lightly moisten the touching surfaces with water or a dab of the egg wash to help them adhere. Avoid overhandling, which warms the butter and causes spreading. Proper spacing on the baking sheet also prevents merging.
- → Can I use royal icing instead of the simple glaze mentioned?
-
Yes, royal icing creates a beautifully smooth, professional finish and sets completely hard. Prepare meringue powder with powdered sugar and water, then pipe or spread over cooled cookies. The glaze specified in the instructions provides a softer, shine-enhancing finish that's quicker to prepare but remains slightly tacky. Both options work well for these treats.
- → What alternatives work for the chick eyes and beaks if I don't have decorating gels?
-
Mini chocolate chips, regular chocolate chips cut in half, or even tiny dots of melted dark chocolate all make excellent eyes. For beaks, try small orange candy-coated chocolates, cut-up orange Starburst or fruit chews, or piped orange frosting. Even a small triangle of orange bell pepper works for savory variations. Use whatever edible items you have on hand.
- → Why did my cookies spread excessively in the oven?
-
Excessive spreading usually indicates warm dough or softened butter. If your dough feels sticky or soft, refrigerate for 15-30 minutes before baking. Also ensure your oven is fully preheated—a cold start gives butter more time to melt before structure sets. Finally, measure flour accurately; too little flour creates a loose dough that spreads more readily.