 Pin it
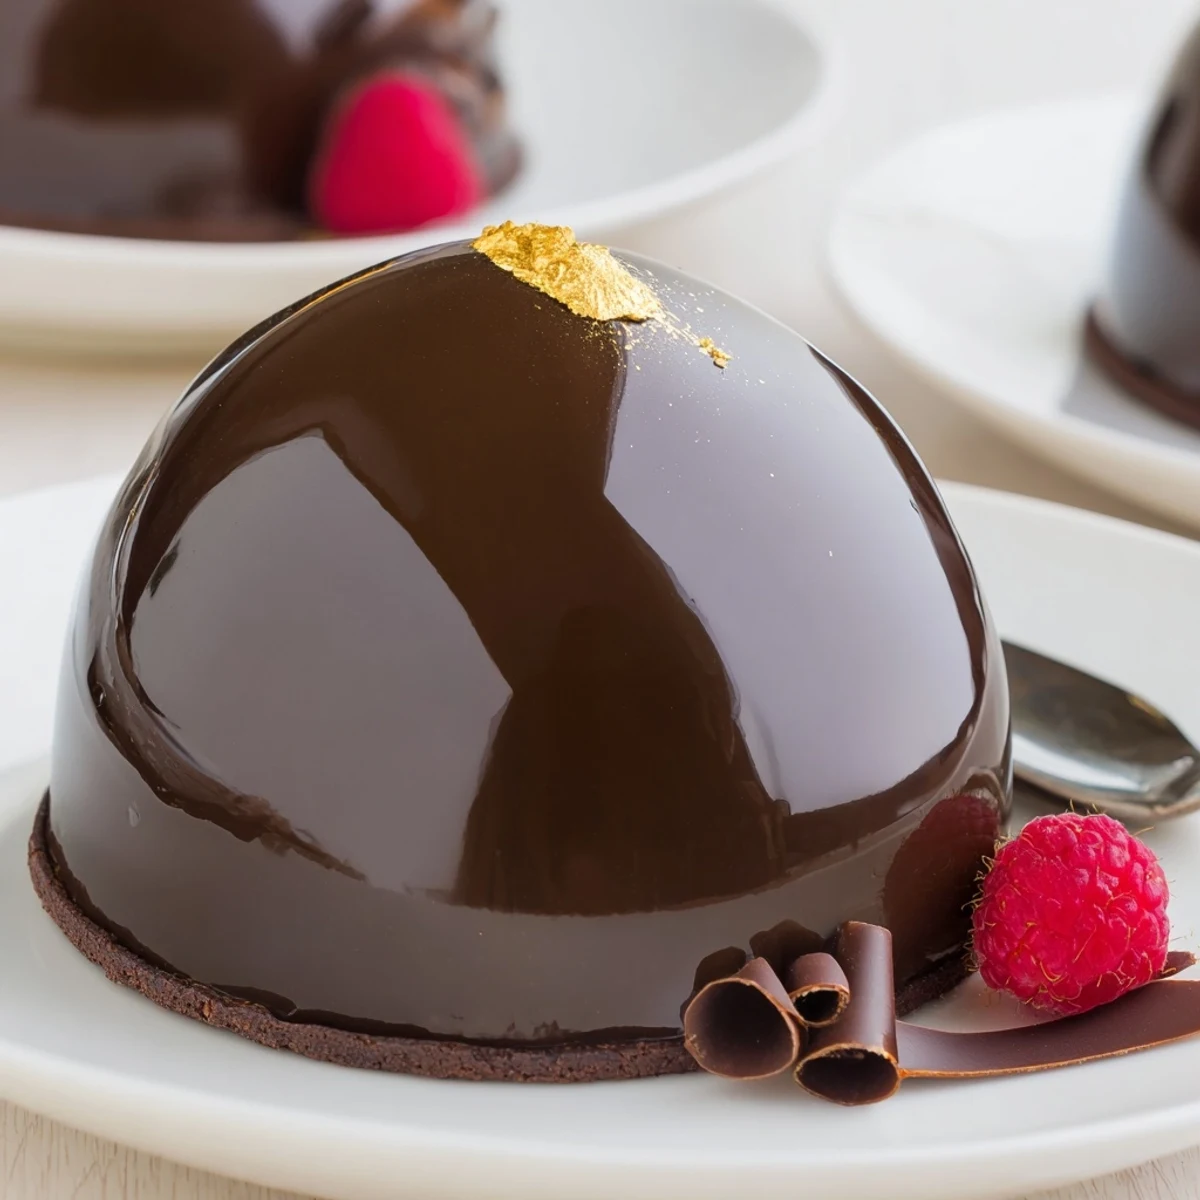
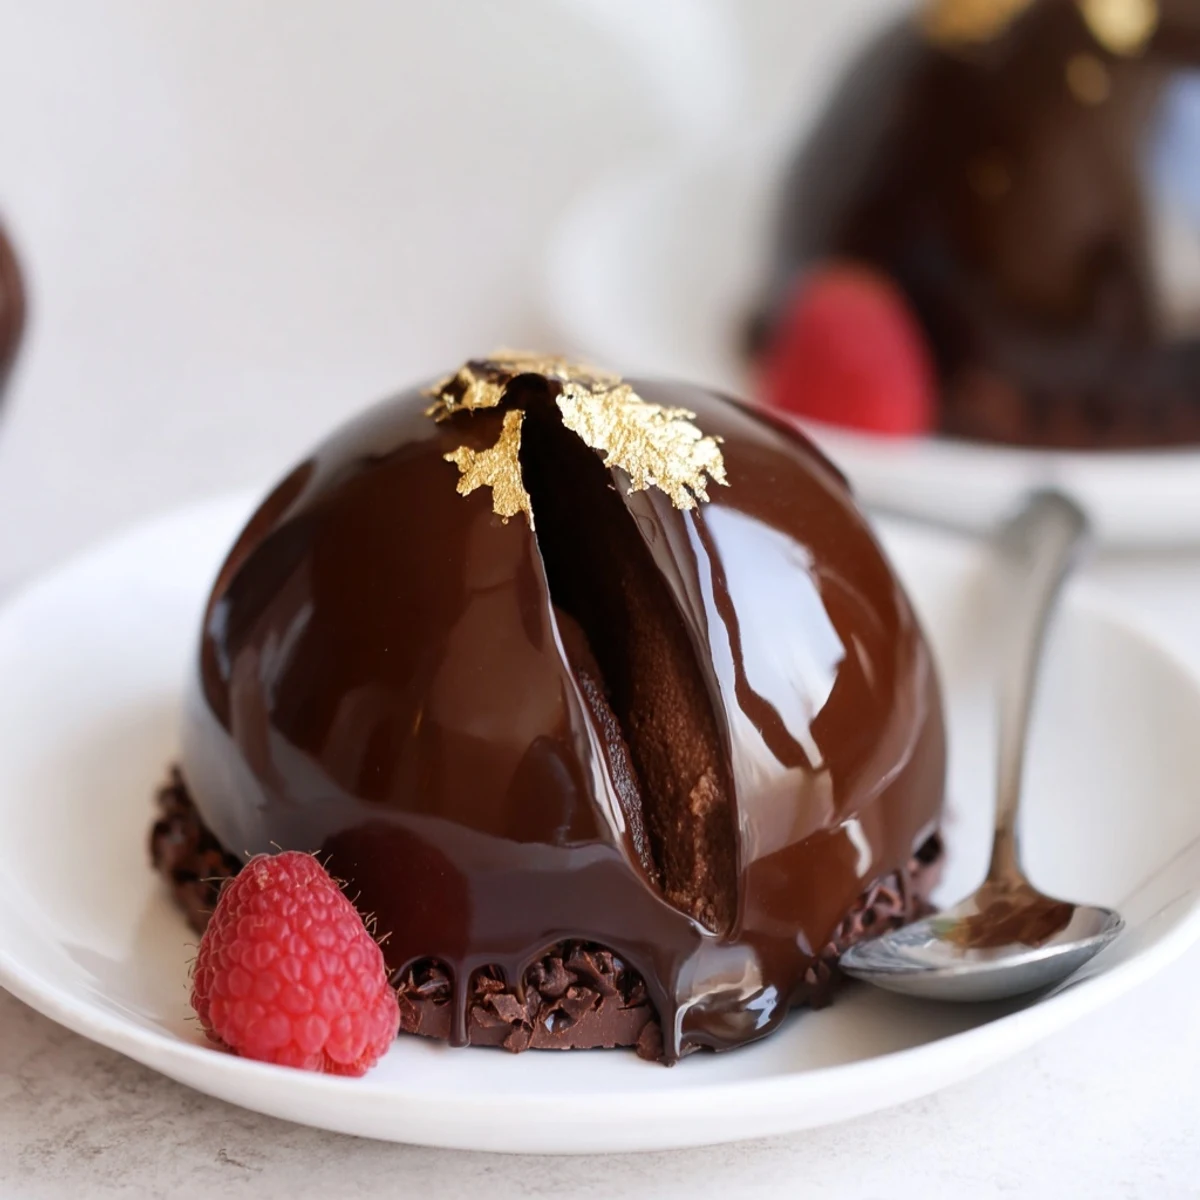
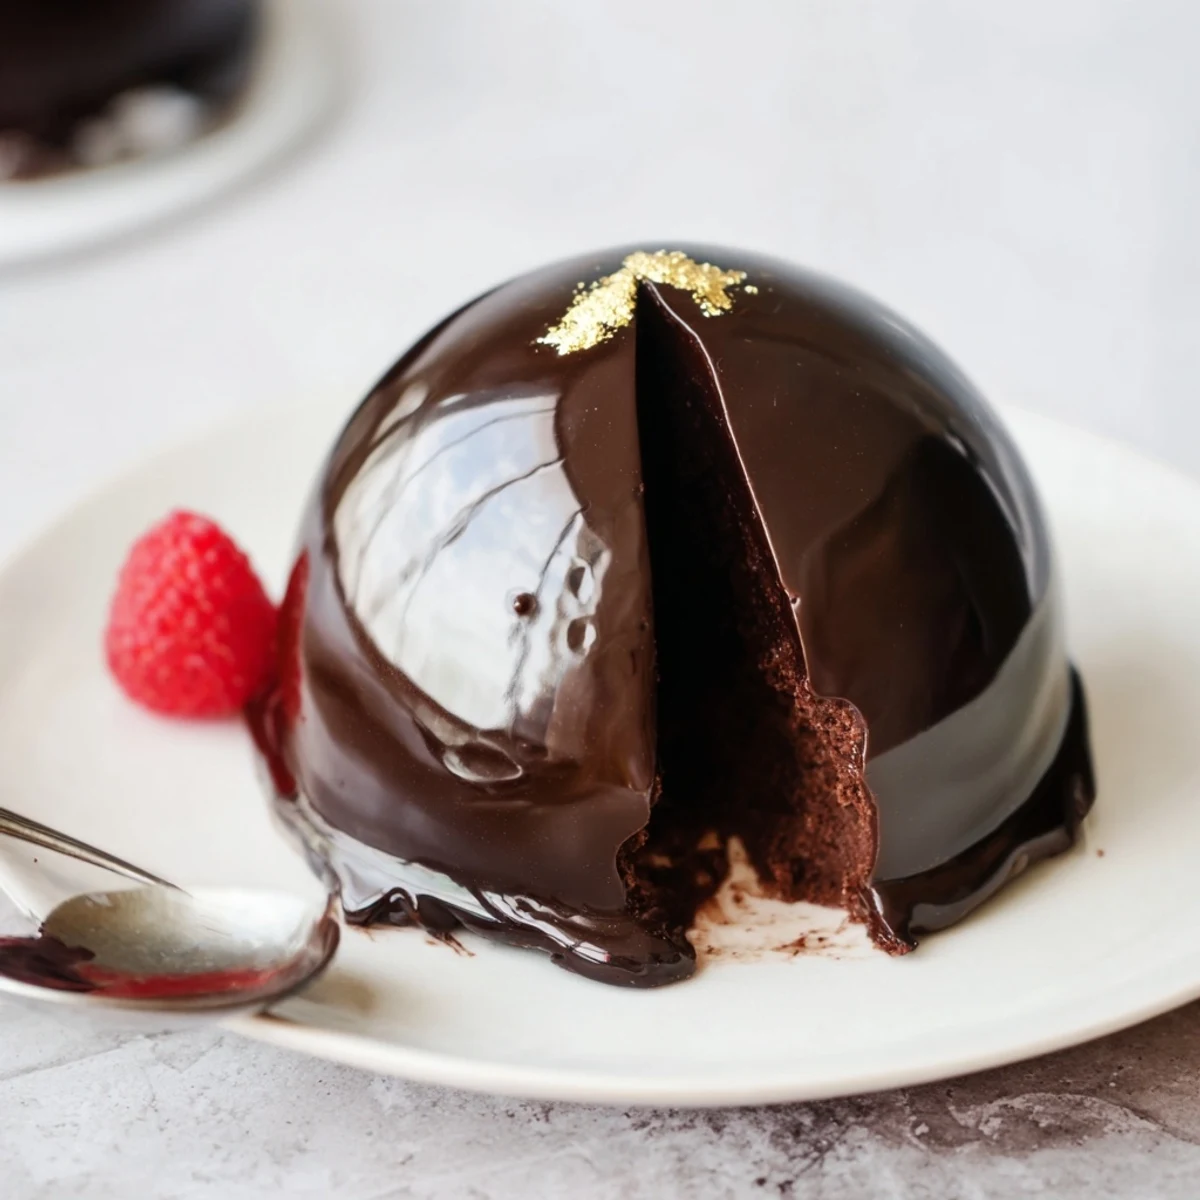
 This elegant chocolate-mascarpone dome combines a chilled, stabilized mascarpone mousse piped into crisp dark chocolate shells. Gelatin is used to set the mousse, allowing easy unmolding after refrigeration. A warm chocolate mirror glaze is poured at the correct temperature to achieve a glossy finish. Finish with gold leaf, curls or berries and allow additional chilling to ensure the glaze sets before serving.
The first time I attempted these chocolate mascarpone domes it was purely for the thrill of tackling something that seemed intimidating. My kitchen quickly filled with the aroma of melted dark chocolate, and between each step, I caught my reflection in the glossy bowls like a mischievous kid in a science lab. There was something oddly satisfying about transforming basic ingredients into a dessert that looked straight out of a boutique pâtisserie. Even the splatters on my apron felt like a badge of honor.
I’ll never forget unveiling these domes at a late autumn dinner party—cutlery paused mid-air as friends gawked at the mirror finish. Someone broke the silence by tapping a spoon to check if the shell was really as glossy and delicate as it looked. The collective anticipation made each bite feel doubly rewarding, and we joked about starting a competitive dome-making league in our tiny kitchens.
Ingredients
- Dark chocolate (at least 60% cocoa): For the shells, a high-quality dark chocolate ensures a snappy shell and deep flavor—tempering isn’t essential for home cooks, but take time to double-coat the molds for strength.
- Mascarpone cheese: Only use cheese that’s chilled and fresh; it gives the mousse its signature silkiness, with a subtle tang that’s the backbone of this dessert.
- Heavy cream: Whip it just to soft peaks and not further, or you risk the mousse becoming dense; the cream softens the mascarpone perfectly.
- Powdered sugar: Sift to avoid lumps and to blend easily with the mascarpone for a smooth mouthfeel.
- Vanilla bean paste or extract: Just a teaspoon will deepen the mousse—paste with flecks looks beautiful if you have it.
- Gelatin: Sheets or powder work, but ensure you completely dissolve it to avoid chewy bits.
- Cocoa powder: Sifted for smooth glaze, and opt for a good brand for the best color and taste.
- Gold leaf, chocolate curls, fresh berries: Optional, but a little flourish makes these domes a centerpiece rather than just dessert.
Instructions
- Make the Chocolate Shells:
- Melt the chocolate slowly until just glossy, then brush or spoon it into your silicone dome molds—a pause to chill and a second coat really ensures they won’t crack later.
- Prepare the Mascarpone Mousse:
- Soften your gelatin and then gently warm to dissolve completely; fold silky mascarpone, vanilla, and sifted sugar together before lightening it with softly whipped cream—adding the gelatin is like a magic trick as it binds all that fluffiness.
- Fill and Set:
- Spoon or pipe the finished mousse into the chocolate shells, smoothing the tops with a spatula and letting the domes chill until they feel firm when pressed.
- Unmold the Domes:
- This is the exciting part—carefully pop each dome from its silicone shell and set them onto a wire rack, ready for their glossy coats.
- Mix the Mirror Glaze:
- Simmer sugar, water, cream, and cocoa in a saucepan till luscious and smooth, then off the heat add softened gelatin and stir until utterly sleek—let it cool just to the right temperature for pouring, which should feel slightly warm but not hot to the touch.
- Glaze and Decorate:
- Pour in confident steady motions to cover each dome; any excess glaze slips off, leaving a show-stopping shine—finish with gold leaf or chocolate curls, and let everything set before serving with pride.
 Pin it
 One afternoon, I caught my partner peeking into the fridge every hour, unable to resist the domes’ spell as they set. By the time we finally sliced into one together, it felt like cracking the code to a patisserie’s best-kept secret—the mousse inside was impossibly soft against the thin shell, and it was suddenly clear why sharing dessert can be an act of pure magic.
Choosing Your Chocolate Wisely
Experimenting with chocolates of different cocoa percentages has shown me that it’s worth spending a little extra—cheaper varieties tend to be waxy and nearly impossible to coat the molds smoothly. If you want an even glossier shell, polish the inside of each dome mold with a soft cloth before adding the melted chocolate.
Getting the Mousse Just Right
Over-mixing the mousse can result in a dense base rather than an airy middle, so the trick is to stop folding the instant the last streak of cream disappears. If your gelatin looks lumpy, reheat it ever so gently until clear—this step alone can rescue the smoothness of your mousse.
Serving and Decorating Like a Pro
Chilling the plates before you assemble the finished domes helps the glaze set and ensures lasting shine at the table. Brush a touch of edible gold leaf or drop a berry on top right before serving to give the dessert that sense of occasion every time.
- Leave domes unglazed for a rustic, matte finish if you prefer less sweetness.
- Pair with espresso for a grown-up vibe or a drizzle of berry coulis for contrast.
- Don’t rush through the final decoration—those few extra seconds give your passion its spotlight.
 Pin it
 There's something about the gentle ritual of making these domes that makes every slice feel special. Invite friends to break open their own shell, and watch as all the effort turns into simple, sparkling joy.
Recipe FAQ
- → How thick should the chocolate shells be?
-
Coat silicone dome molds twice, chilling between layers, to build shells about 2–3 mm thick; thin shells risk cracking while thicker shells create a sturdier bite.
- → Do I need to temper the chocolate?
-
Tempering improves snap and sheen, but for molded domes you can use properly melted and cooled chocolate if it sets firmly; tempering gives the best long-term stability.
- → What’s the best way to dissolve gelatin for the mousse?
-
Soak leaf gelatin in cold water briefly or bloom powdered gelatin in cold water, then dissolve gently over low heat before folding into the mascarpone mixture to avoid lumps.
- → At what temperature should I pour the mirror glaze?
-
Cool the glaze to roughly 30–33°C (86–91°F) for optimal viscosity; warmer glaze will run off and cooler glaze will thicken and not spread smoothly.
- → How far ahead can these domes be made?
-
You can prepare and chill the domes a day in advance; glaze them the same day you plan to serve for the freshest shine, then keep refrigerated until serving.
- → Any tips for unmolding the domes cleanly?
-
Ensure shells are fully chilled and slightly contracted from the mold, then press gently from the base and lift using a thin offset or by warming the exterior briefly with your hands to ease release.