Pin it
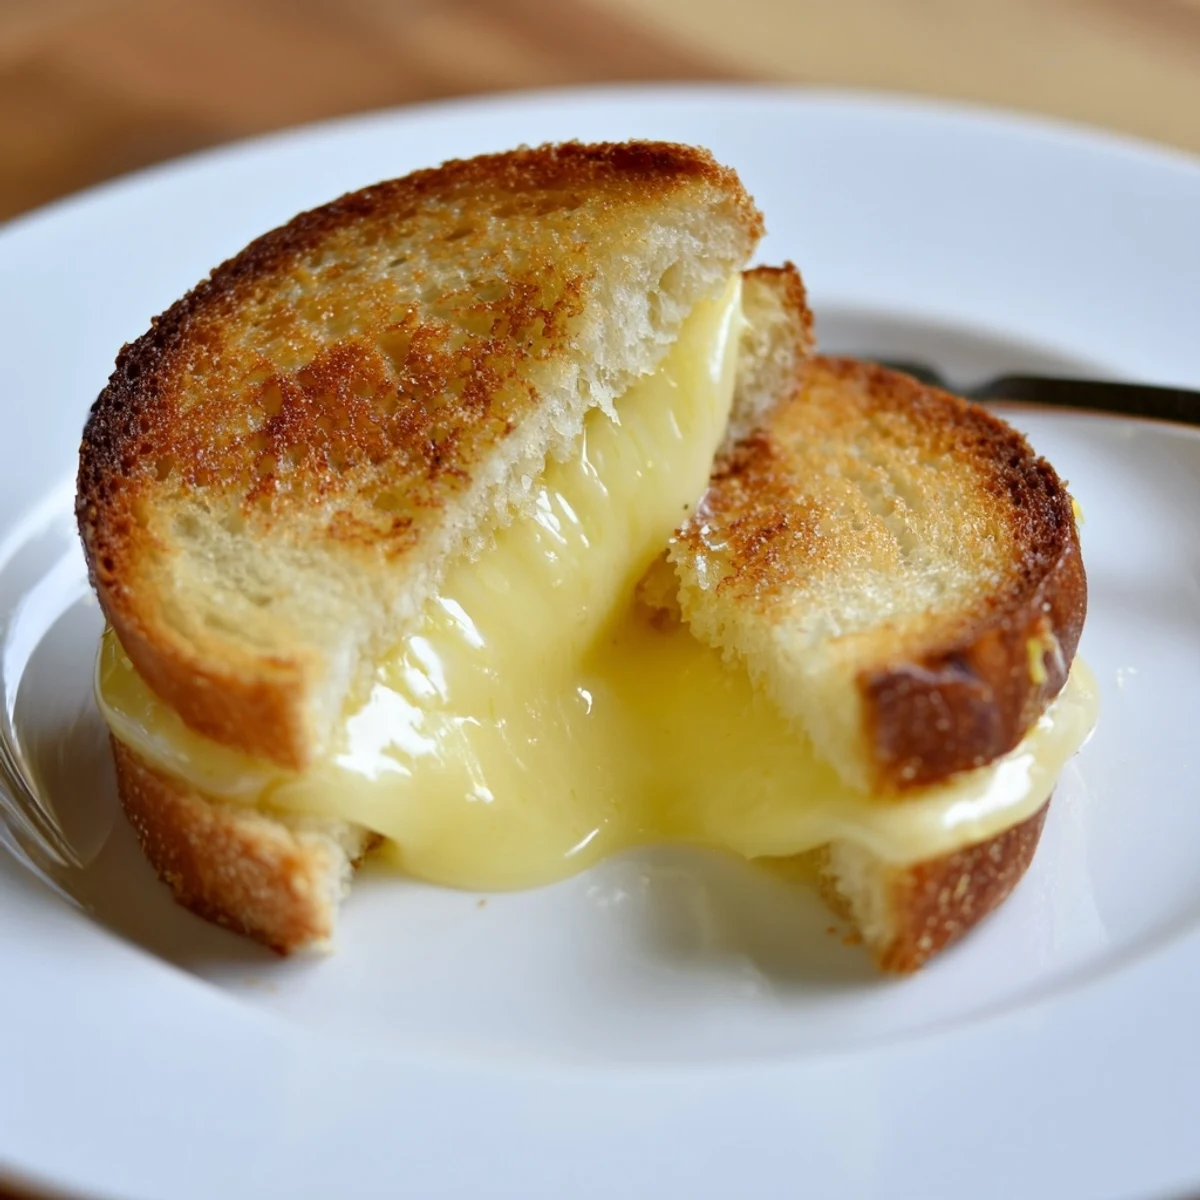
 These bite-sized grilled cheese sandwiches use a 12-count pack of sweet Hawaiian rolls split in half, layered with sliced cheddar (and optional ham), brushed with melted butter mixed with mustard and honey, then baked 10–15 minutes until golden and melty. Makes 12 mini sandwiches in about 25 minutes. Swap cheeses, add caramelized onions or serve with tomato soup for a classic pairing.
If I listen closely, I can still hear the sizzle from the first time I gave these mini grilled cheese Hawaiian rolls a try in my tiny apartment kitchen. My windows fogged up from the oven warmth, and the sweet scent of butter toasting on pillowy rolls mingled with a hint of melted cheddar. Curiosity got the best of me—could bite-sized grilled cheese satisfy my craving, or would they just be cute appetizers? The answer landed squarely on delicious, and I’ve made them on every whim since.
Last summer, I brought a tray of these straight from the oven to a backyard picnic and watched them vanish before I could snag a second one for myself. My cousin joked it was the only time we agreed on anything: melty cheese and soft rolls at sunset beat any fancy appetizer hands-down. Even my picky nephew offered to “help” next time, just to try them hot. There’s something universally winning about food you eat with your hands while laughing outside.
Ingredients
- Hawaiian sweet rolls: Their subtle sweetness and soft bite bring these mini sandwiches to another level—I always slice the whole block at once for best results.
- Sliced cheddar cheese: This melts beautifully, but feel free to mix varieties if you're feeling bold—thicker slices mean extra gooey bites.
- Unsalted butter, melted: Brushing the rolls before baking gives them that irresistible golden sheen and savory flavor—make sure it's melted for even coverage.
- Deli ham or turkey (optional): These turn the minis into hearty snacks, but simply skip for a vegetarian twist.
- Dijon or yellow mustard (optional): This adds just a touch of tangy brightness—don’t overdo it or it might overpower the cheese.
- Honey (optional): Sweetens the butter glaze if you want things extra sticky and delicious.
- Garlic powder (optional): I sometimes give a little dusting on top for that savory, aromatic finish.
Instructions
- Set your stage:
- Heat the oven to 350°F (175°C) and line a baking sheet with parchment paper—trust me, cleanup later will thank you.
- Slice the rolls:
- Use a serrated knife to halve the entire block of rolls horizontally—keep them attached so everything stays neat when assembling.
- Layer up the good stuff:
- Lay the bottom half of rolls on your baking sheet, then blanket them with cheddar cheese; if you’re adding deli meat, tuck in layers now for extra savoriness.
- Add the crowns:
- Place the top half of the rolls gently over your cheesy pile so nothing slides out of place.
- Mix and brush:
- In a small bowl, stir together melted butter, mustard, honey, and a dash of garlic powder if you like a punchy glaze—then brush generously over the tops of the rolls.
- Bake to bubbly golden bliss:
- Pop the pan in the oven for 10 to 15 minutes—the rolls should smell sweet and toasty, and the cheese will bubble at the edges.
- Cool and cut:
- Let the tray rest 2 minutes, then slice into individual mini sandwiches—best eaten warm while the cheese is perfectly stretchy.
 Pin it
 One rainy day, we ended up playing cards for hours while batches of these rolls disappeared from the coffee table—no forks, no plates, just buttery fingers and lots of laughter. Food rarely brings people to the floor like these did, and those sticky fingered smiles have stuck in my memory.
Making It Your Own
I started sprinkling shredded pepper jack between cheese slices whenever I want an extra bit of kick—the secret is to go light so things don’t slide around once melted. One time I tried leftover caramelized onions inside, and it completely changed the flavor profile in the best possible way. Don’t be afraid to play around with what’s hiding in your fridge.
Serving Suggestions
They pair perfectly with a warm bowl of tomato soup, but I’ve also served these with a crunchy salad or homemade pickles to cut the richness. For parties, arrange them in a circle on a big platter and watch people hover until they cool enough to grab. Sometimes, the simplest snacks cause the most excitement—especially when melted cheese is involved.
Unexpected Wins (and Tiny Mishaps)
The first time I made these at a friend’s house, I accidentally doubled the honey and discovered the glaze turned candy-like and sticky—a happy accident that everyone wanted to recreate. Even the quiet guest asked for the recipe, which felt like a win. Tiny sandwiches seem to have a way of making new memories every single time.
- If rolls are stale, warm them just a bit before slicing.
- Slice with a gentle sawing motion to avoid tearing the bread.
- Don’t walk away while baking—the difference between golden and overdone is just a few minutes.
 Pin it
 I love how something this simple can instantly turn a regular snack into an occasion. Ready in minutes, these mini grilled cheese Hawaiian rolls always spark smiles—no matter how old your guests are.
Recipe FAQ
- → How do I prevent soggy bottoms?
-
Keep fillings light and evenly distributed, avoid excess sauce, and bake until the tops are golden. Placing the tray on a preheated baking sheet helps crisp the bottoms.
- → What cheeses work best as substitutes?
-
Try Swiss, provolone, gruyère or pepper jack for different flavor profiles. Firmer, well-melting cheeses give a gooey center without turning greasy.
- → Can I assemble ahead and finish later?
-
Yes. Assemble and cover, then refrigerate for up to 24 hours. Bake 10–15 minutes from chilled, or bake briefly then reheat to finish just before serving.
- → How can I add protein or keep it vegetarian?
-
Add thinly sliced ham or turkey between the cheese layers, or opt for plant-based deli slices to keep it vegetarian. Caramelized onions or roasted tomatoes boost umami without meat.
- → Is a stovetop method possible?
-
Yes. Cut into individual sandwiches and cook in a skillet over medium heat, covered, for a few minutes per side until cheese melts and the bread is golden.
- → Best way to slice without crushing the rolls?
-
Use a serrated bread knife and a gentle sawing motion. Let the baked block rest 1–2 minutes to set the cheese before cutting into individual pieces.