 Pin it
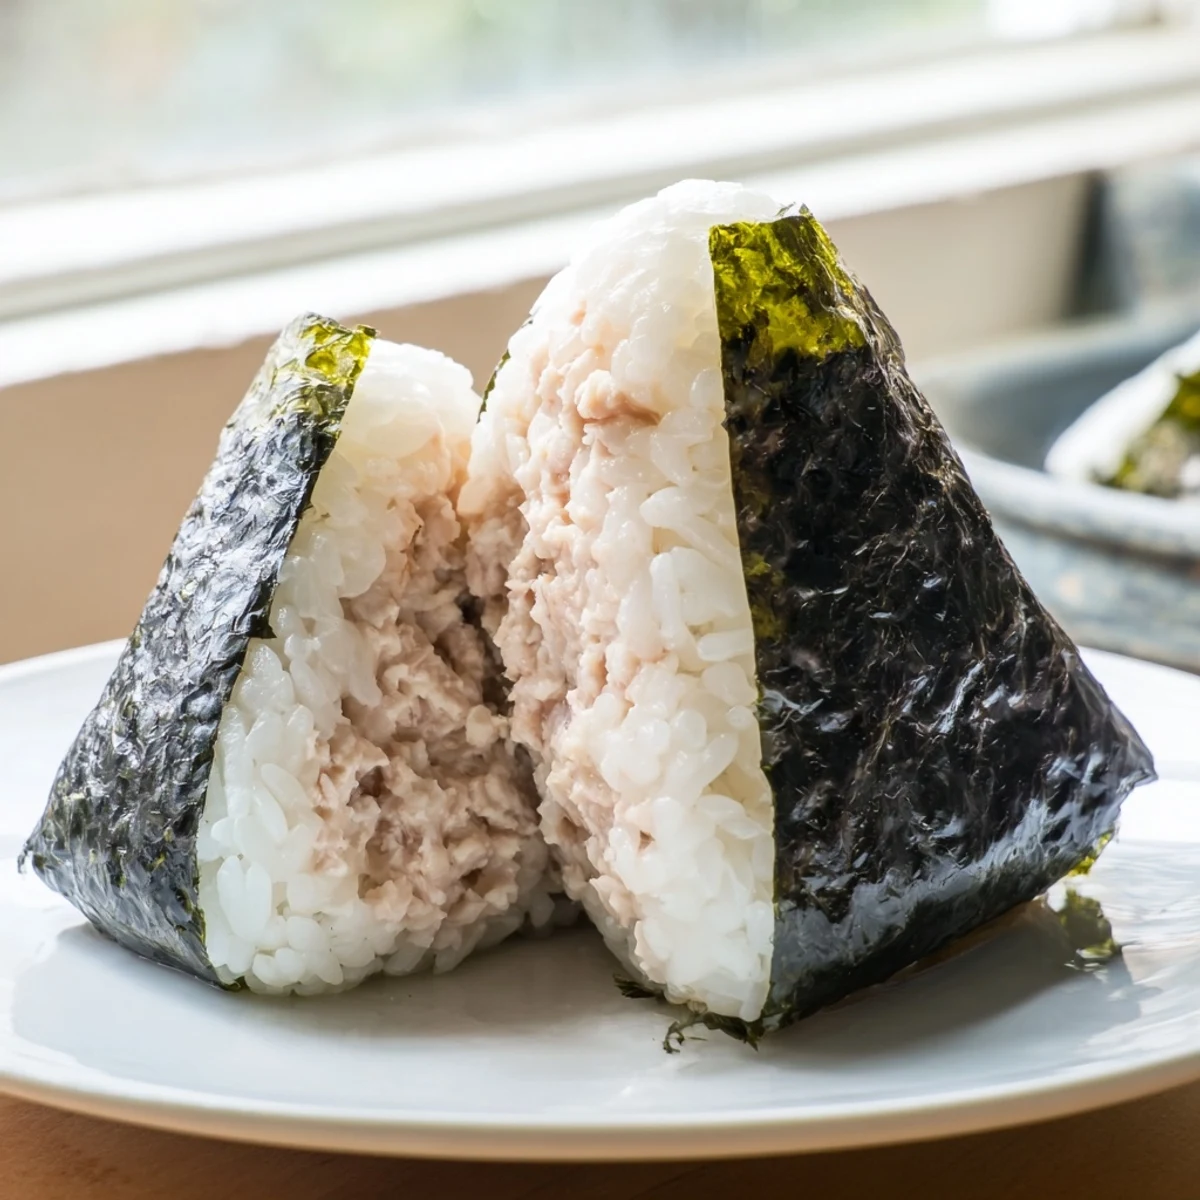
 These traditional Japanese rice balls feature a savory filling of canned tuna blended with creamy Japanese mayonnaise, soy sauce, and black pepper. The warm short-grain rice gets shaped by hand with salted palms to prevent sticking, then wrapped with crispy nori strips for easy handling. Perfect for meal prep, school lunches, or quick snacks, each onigiri takes just minutes to assemble once the rice is cooked.
The konbini freezer section in Tokyo taught me more about portable food than any cookbook ever could. Those perfectly triangular rice balls wrapped in crisp nori, nestled in their plastic armor, were my go-to train ride companions during a solo trip through Japan last autumn. Tuna mayo was always the first flavor to sell out, and once I tasted one still cold from the refrigerated case, I finally understood why people will sprint to catch the morning commuter train just to grab one before they vanish.
My roommate walked in while I was pressing rice into triangles at the kitchen counter and asked if I had gotten fired and was opening a food truck. I handed her one still warm and she stood there chewing quietly before saying absolutely nothing and reaching for a second one, which told me everything I needed to know.
Ingredients
- Japanese short grain rice (2 cups): This is non negotiable because long grain rice will crumble apart and refuse to stick together no matter how much you plead with it.
- Water (2 1/2 cups): The ratio matters more than you think so measure carefully rather than eyeballing.
- Tuna in water, drained (1 can, 5 oz): Drain it thoroughly by pressing the lid down into the can because excess moisture makes the filling soupy and weakens the rice seal.
- Japanese mayonnaise (3 tablespoons): Kewpie is ideal because the extra egg yolk and rice vinegar give it a richness that regular mayo simply cannot replicate.
- Soy sauce (1 teaspoon): Just a splash deepens the savory note without overpowering the gentle tuna flavor.
- Ground black pepper (1/4 teaspoon, optional): I always add it because that tiny prickle of heat balances the creaminess beautifully.
- Salt (1/2 teaspoon): Rubbed onto wet palms while shaping so it seasons the outside of each rice ball and prevents sticking simultaneously.
- Nori sheets, cut into strips (6 small pieces): Wrap these on right before eating if you want them to stay crackling crisp rather than going soft.
Instructions
- Wash the rice clean:
- Rinse the rice under cold running water, swirling gently with your fingers, until the water turns from milky cloudiness to near clarity which usually takes about four or five changes of water.
- Cook until tender:
- Combine the rinsed drained rice with two and a half cups of water in a rice cooker or heavy bottomed pot and cook according to your usual method, then let it steam covered for ten minutes undisturbed so every grain finishes gently.
- Build the filling:
- While the rice rests, dump the drained tuna into a bowl with mayonnaise, soy sauce, and pepper, then mash and stir until it becomes a uniform creamy paste that holds together when you scoop it.
- Prepare your hands:
- Fill a small bowl with water and keep it nearby because you will wet your palms frequently and rub a pinch of salt onto them each time to keep the rice from plastering itself to your skin like edible cement.
- Shape and stuff:
- Scoop roughly half a cup of warm rice into one palm, press a shallow well into the center, spoon in a generous mound of tuna mayo, then fold the rice up and around the filling while cupping your other hand over the top to enclose it completely.
- Form into triangles:
- Gently rotate and press the rice between your palms, forming it into a firm triangle or oval by using your fingers to sharpen the corners and smooth the sides without squeezing so hard that the filling bursts out.
- Wrap with nori:
- Press a strip of nori onto the bottom edge of each rice ball, wrapping it partway up the sides, and either serve immediately or leave the nori separate for wrapping later if you are packing them to go.
 Pin it
 Packing these into a bento box with some pickled vegetables and a folded origami crane made from wax paper felt like sending a small care package to my future hungry self.
Keeping Nori Crisp and Snappy
The biggest disappointment is biting into an onigiri only to find the nori has gone limp and chewy against the moist rice. Wrap the strips separately in plastic or tuck them into a tiny compartment of your lunch container and press them on right before eating for that satisfying snap.
Flipping the Filling
Tuna mayo is the gateway but once you master the basic technique you can stuff onigiri with almost anything. Salted salmon flakes, pickled plum, or even a square of melting cheese tucked into the center each turn the same rice ball into something completely different and exciting.
Making Them Ahead Without Ruin
These are best eaten the day they are made but life does not always cooperate with ideal snack timing. Wrap each one tightly in plastic and store in the refrigerator for up to twenty four hours, then let it sit at room temperature for fifteen minutes before eating so the rice softens back to its proper texture.
- A damp paper towel tucked inside the container helps keep the rice from drying out in the fridge.
- Label them if making different fillings because guessing wrong is a minor tragedy.
- Never freeze them because the mayonnaise filling will break and the rice turns grainy upon thawing.
 Pin it
 There is something quietly perfect about food you can hold in one hand, and these little rice triangles have earned a permanent spot in my weekly rotation for that reason alone.
Recipe FAQ
- → What type of rice works best for onigiri?
-
Japanese short-grain rice or sushi rice is essential because its high starch content helps the grains stick together. Long-grain varieties like basmati or jasmine won't hold the triangle shape properly.
- → Can I make tuna mayo onigiri ahead of time?
-
Yes, these can be made up to 24 hours in advance. Wrap tightly in plastic wrap and refrigerate. The rice will firm up slightly when cold but remains tasty. Let come to room temperature before eating for best texture.
- → What's the difference between Japanese and regular mayonnaise?
-
Japanese mayonnaise like Kewpie uses egg yolks only and rice vinegar, creating a richer, creamier, and slightly tangier flavor compared to American-style mayo made with whole eggs and distilled vinegar.
- → How do I keep onigiri from falling apart?
-
Use warm rice, wet your hands with water, and lightly salt your palms before shaping. Don't overfill with the tuna mixture, and press firmly but gently when forming the triangles. Let cool slightly before handling.
- → Can I freeze tuna mayo onigiri?
-
It's not recommended to freeze onigiri with mayonnaise-based fillings as the texture becomes grainy and watery when thawed. Best enjoyed fresh or refrigerated within 24 hours. For freezing, use fillings like pickled plum or grilled salmon.