Pin it
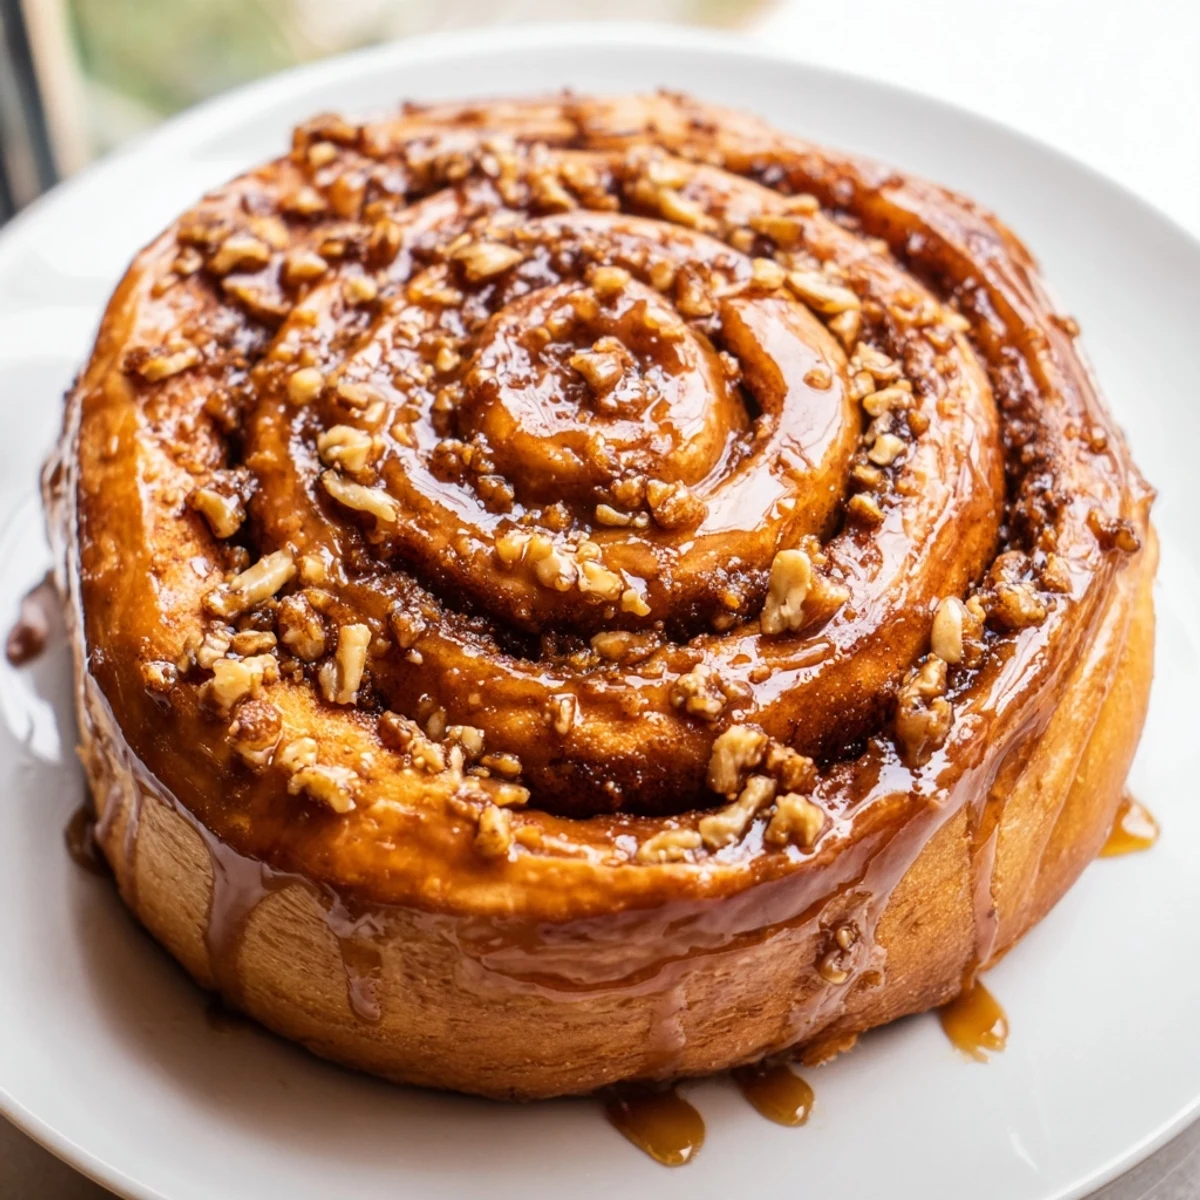
 These Vietnamese Cinnamon Date Sticky Buns feature a soft, pillowy dough swirled with aromatic Vietnamese cinnamon and naturally sweet Medjool dates. After baking to golden perfection, they're inverted to reveal a luscious sticky glaze made from butter, brown sugar, and honey. The unique warmth of Vietnamese cinnamon pairs beautifully with the earthy sweetness of dates, creating a fusion twist on the classic morning pastry. Perfect for weekend brunch or special breakfast occasions.
The way Vietnamese cinnamon hits your nose is unlike any other spice. I first discovered its warm, sweet intensity at a tiny market in Saigon during what was supposed to be a quick stop between meetings. Three hours later, I walked out with bags of cinnamon and a local grandmother handwritten recipe that evolved into these sticky buns. The dates add this incredible natural sweetness that balances the cinnamon is bold personality perfectly.
I made these for my sister is birthday brunch last spring, and honestly, I was nervous about the fusion element. My brother in law took one bite, closed his eyes, and said I hate cinnamon buns usually, but I would fight someone for the last one of these. Now they is requested at every family gathering, and I have learned to double the recipe because a single batch disappears in minutes.
Ingredients
- All purpose flour (400 g): Creates that perfect pillowy texture that holds up to all that gooey filling without getting soggy
- Active dry yeast (7 g): Fresh yeast makes all the difference, always check the expiration date on those tiny packets
- Whole milk (120 ml): Warm it gently like you would for a baby bottle, too hot kills the yeast, too cold makes it sluggish
- Unsalted butter (175 g total): Melted in the dough for tenderness and softened for spreading, control your salt this way
- Medjool dates (175 g): These soft, caramel like fruits are worth every penny, cheaper dried dates just do not melt the same way
- Vietnamese cinnamon (2 tbsp): This is the star, it is sweeter and more intense than regular cinnamon and absolutely essential here
- Light brown sugar (260 g total): Packed tight, that molasses flavor complements the dates and cinnamon beautifully
- Honey (60 ml): Adds this floral note to the glaze that maple syrup just cannot replicate
- Heavy cream (2 tbsp): Makes the glaze luxuriously smooth and helps it caramelize in the oven
Instructions
- Wake up the yeast:
- Combine your warm milk and yeast in a large bowl, then walk away for 5 minutes, that foamy layer on top means it is alive and ready to work
- Build your dough:
- Whisk in the sugar, melted butter, eggs, and salt until everything is blended, then gradually add the flour, stirring until you have a sticky, shaggy dough that holds together
- Knead until smooth:
- Dump the dough onto a lightly floured surface and knead for 7 to 8 minutes, it should feel smooth and slightly tacky, bouncing back when you poke it
- First rise:
- Place the dough in a greased bowl, cover it with a warm towel, and find the coziest corner of your kitchen, let it double in size, which takes about 1 to 1.5 hours
- Make the magic glaze:
- Melt butter in a saucepan over medium heat, stir in the brown sugar, honey, cream, and pinch of salt, keep stirring until it bubbles and becomes this gorgeous caramel, about 2 to 3 minutes
- Prep your pan:
- Pour that bubbling glaze into your 9x13 inch baking dish, tilting to coat the bottom evenly, this is what creates the sticky situation we want
- Prepare the filling:
- Mix the brown sugar and Vietnamese cinnamon in a small bowl until combined
- Roll it out:
- On a floured surface, roll your dough into a 12x16 inch rectangle, do not stress about perfection, just aim for relatively even thickness
- Layer on the flavor:
- Spread the softened butter over the dough, sprinkle with your cinnamon sugar mixture, then scatter those chopped dates everywhere, press them in gently so they stick
- Roll and slice:
- Tightly roll the dough from the long side, use a sharp knife to cut into 12 even pieces, saw gently rather than pressing down to keep the shape intact
- Second rise:
- Arrange the buns cut side up in the prepared dish, they will snuggle together as they rise, cover and let them puff up for 45 minutes until they look happy and swollen
- Bake to golden:
- Preheat your oven to 350 degrees F, bake for 28 to 32 minutes, you want them deeply golden, and the glaze should be bubbling up around the edges
- The flip:
- Let them cool for exactly 5 minutes, no more, then invert onto a serving platter so all that sticky goodness cascades over the top
 Pin it
 These buns have become my go to when life feels overwhelming, something about the process of kneading dough and waiting for rise is incredibly grounding. Last month, my neighbor smelled them baking and knocked on my door with a container of her homemade vanilla ice cream, and we stood in my kitchen eating warm sticky buns with melting ice cream at 11pm on a Tuesday. Some of the best moments happen around food like this.
Making Them Ahead
You can assemble these completely through the slicing step, then cover the pan tightly and refrigerate overnight. The next morning, let them sit at room temperature for 30 minutes while the oven preheats, then bake as directed. The flavors actually develop more depth with this overnight rest, and I love that I can wake up to something this indulgent with almost no morning effort.
Customizing Your Filling
While I absolutely love the date and cinnamon combination, the base dough is incredibly forgiving. I have made these with chopped pecans for crunch, orange zest for brightness, or even swapped the dates for dried figs when that is what I had in the pantry. The key is keeping the total amount of add ins similar so the roll still holds together properly.
Serving Suggestions
These are spectacular on their own, but a scoop of vanilla ice cream creates this incredible hot and cold situation. A strong cup of coffee or Thai iced tea cuts through the richness beautifully. For brunch, pair with fresh fruit to balance all that sweetness.
- Warm any leftovers for 20 seconds in the microwave, they taste almost as good as fresh
- Freeze individually wrapped buns for emergency sweet cravings, thaw overnight then warm gently
- Make mini versions in a muffin tin for portion control, though good luck eating just one
 Pin it
 There is something deeply satisfying about pulling a warm, sticky bun apart and seeing all those layers. I hope these find a way into your kitchen and maybe even become part of your own story.
Recipe FAQ
- → What makes Vietnamese cinnamon different from regular cinnamon?
-
Vietnamese cinnamon, also known as Saigon cinnamon, has a higher oil content than other varieties, making it exceptionally fragrant and sweet with a strong, warm spiciness. Its bold flavor stands out beautifully in baked goods.
- → Can I prepare these sticky buns the night before?
-
Yes! After arranging the sliced buns in the prepared dish, cover tightly and refrigerate overnight. Let them come to room temperature and rise for 45-60 minutes before baking as directed.
- → Why invert the buns after baking?
-
Inverting the baked buns onto a platter ensures the sticky caramel glaze that melted during baking coats the tops perfectly. This technique guarantees every bite gets that signature sticky sweetness.
- → Can I use dates other than Medjool?
-
While Medjool dates are preferred for their large size, natural sweetness, and soft texture, Deglet Noor dates work as a substitute. Chop them finely and consider adding an extra tablespoon of brown sugar to compensate.
- → How do I know when the buns are fully baked?
-
The buns are done when they're deep golden brown on top and a thermometer inserted into the center reads 190-200°F. The glaze should be bubbling around the edges, and the dough should feel set when gently pressed.
- → Can I freeze these sticky buns?
-
Bake and cool completely, then wrap individually in plastic and freeze for up to 3 months. Thaw overnight and warm at 300°F for 10 minutes. Alternatively, freeze unbaked buns after the second rise, thaw overnight, and bake fresh.