 Pin it
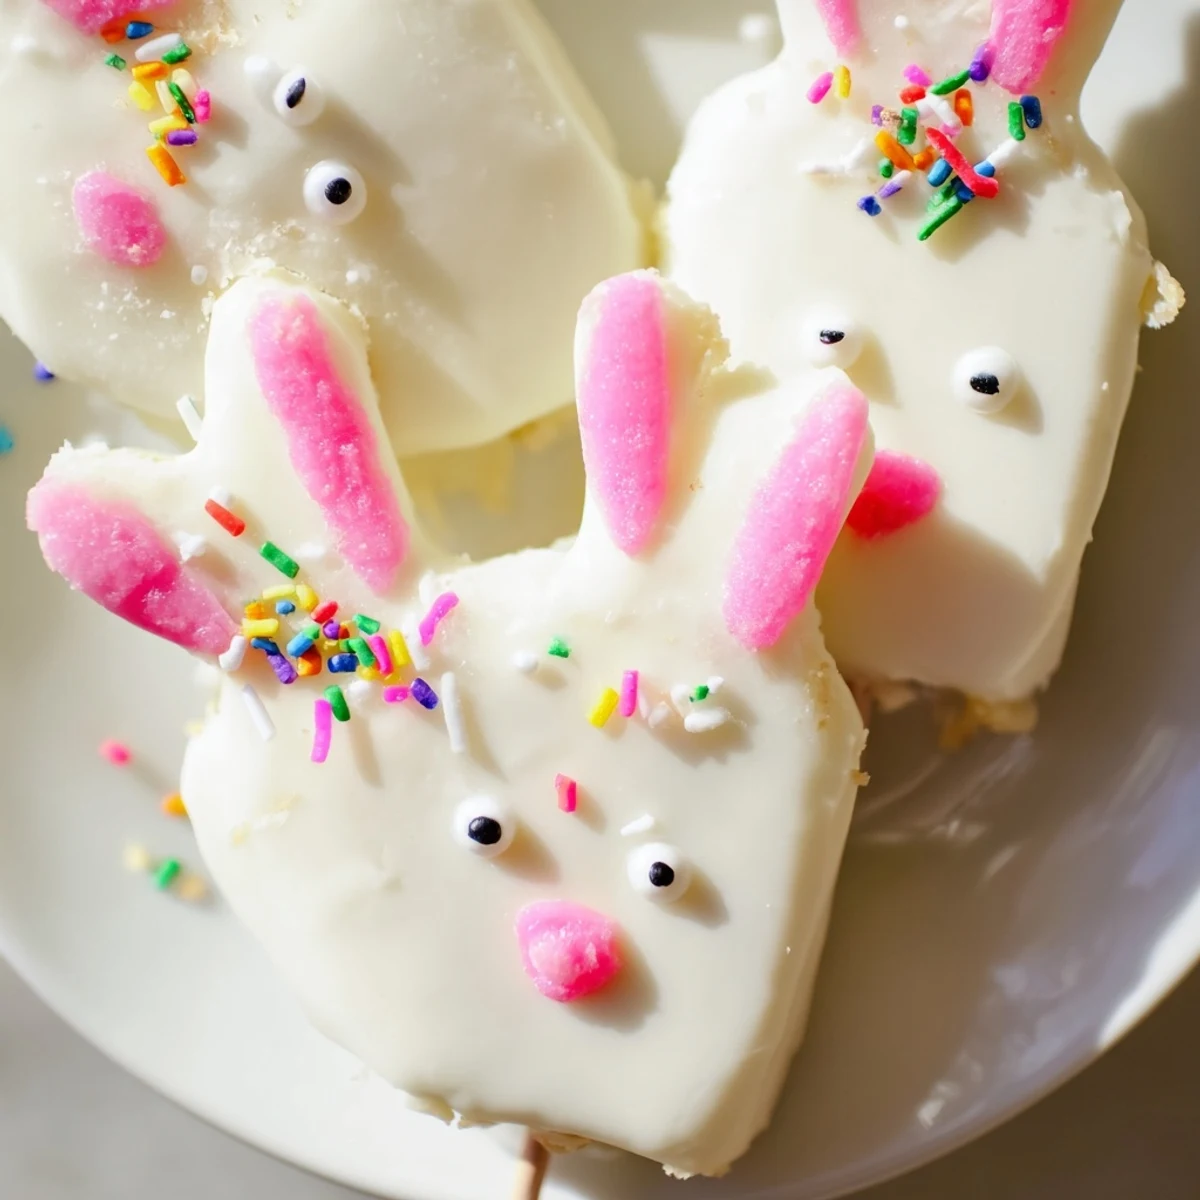
 These charming bunny-shaped cakesicles bring whimsical delight to any Easter gathering. The combination of moist vanilla cake blended with creamy elements creates a perfectly balanced interior, while the premium white chocolate coating adds luxurious sweetness and smooth texture. What makes these treats truly special is their customizable nature—you can personalize each bunny with edible food coloring for ears and noses, add candy eyes for personality, or create unique designs with sprinkles and fondant. The process is wonderfully straightforward, making them ideal for kitchen activities with children or for anyone wanting to add handmade charm to their dessert table.
Beyond their visual appeal, these treats offer practical advantages. They're naturally portion-controlled, easy to serve, and transport beautifully for Easter potlucks or gifts. The preparation allows for creativity in both flavor variations—experiment with chocolate, lemon, or red velvet cake bases—and decorative styling. Each cakesicle becomes a canvas for your imagination, whether you prefer minimalist elegant designs or playful, colorful creations.
Last Easter, my niece kept eyeing the regular cake pops and whispered they looked like plain lollipops. The next weekend, I grabbed some white chocolate and cake scraps from the freezer, determined to make something that would actually make her eyes light up. When she saw the bunny faces, she did a little hop around the kitchen. Now they are the only thing she asks for all year.
I made three dozen of these for my daughters class party last spring. The teacher sent me a photo afterward of all the kids holding their bunny cakesicles up like little trophies. Watching them carefully choose which one to eat first, as if each bunny had its own personality, made the mess totally worth it.
Ingredients
- 1 cup vanilla cake crumbs: Save any leftover cake or cupcakes in the freezer for recipes like this
- 2 tbsp cream cheese: Soften this completely or you will end up with lumpy pockets in your dough
- 1 tbsp unsalted butter: Room temperature butter blends better than cold for the smoothest mixture
- 2 tbsp powdered sugar: This adds just enough sweetness to bind everything without making it cloying
- 1/2 tsp vanilla extract: Pure vanilla makes the cake flavor shine through the white chocolate
- 10 oz white chocolate: Candy melts work beautifully but real white chocolate tastes noticeably richer
- Edible gel food coloring: Keep this on hand for pink noses and the inner ears that make the bunnies come alive
- 8 cakesicle sticks: Dip the very tip into melted chocolate before inserting for extra holding power
- Sprinkles and decorations: Candy eyes, pink hearts for noses, and whatever else makes you smile
Instructions
- Make the cake mixture:
- Mix the cake crumbs, cream cheese, butter, powdered sugar, and vanilla in a medium bowl until the mixture holds together when you squeeze it
- Shape the bunnies:
- Divide into 8 portions and gently press each into an oval shape with slightly pointed ears at the top
- Add the sticks:
- Insert a cakesicle stick about halfway into each shape and press the cake mixture firmly around it to secure
- Chill the shapes:
- Refrigerate for 20 to 30 minutes until firm to the touch, otherwise the chocolate will slide right off
- Melt the chocolate:
- Heat the white chocolate in a microwave safe bowl in 30 second bursts, stirring between each until completely smooth
- Coat the bunnies:
- Dip each cake shape into the chocolate, tap gently against the bowl edge to remove excess coating
- Add decorations:
- While the chocolate is still wet, add candy eyes, pink noses, and any sprinkles before it sets
- Set completely:
- Let them stand at room temperature for about 20 minutes or refrigerate for 5 minutes if you are impatient like me
 Pin it
 My mom made these for the neighborhood egg hunt last year and hid them among the plastic eggs. The kids were more excited about finding the edible bunnies than any candy. One little boy insisted his bunny was too cute to eat and carried it around carefully for an hour before finally taking a tiny nibble of the ear.
Making The Faces
I have found that candy eyes positioned slightly higher on the face give the bunnies a more alert and friendly expression. Pink heart sprinkles turned sideways make the sweetest noses, and a tiny dot of white chocolate in each eye brings them to life completely.
Troubleshooting Chocolate
If your white chocolate becomes too thick and clumpy, add a teaspoon of vegetable oil and stir gently. This usually brings it back to a smooth dipping consistency without affecting the flavor or how it sets.
Storage And Serving
These keep beautifully in an airtight container in the refrigerator for up to three days, though they rarely last that long in my house. Let them come to room temperature for about 10 minutes before serving for the best texture and flavor.
- Stand them up in a jar filled with sprinkles for a cute serving display
- Wrap individually in clear bags tied with pastel ribbon for party favors
- Make them two days ahead if you need to free up kitchen time
 Pin it
 These bunny cakesicles have become my absolute favorite Easter tradition to make with kids. The messy fingers and chocolate smudges are all part of the fun.
Recipe FAQ
- → How long do cakesicles stay fresh?
-
Store in an airtight container in the refrigerator for up to 3 days. The coating may develop condensation when brought to room temperature, so serve chilled for best texture and appearance.
- → Can I make these without a cakesicle mold?
-
Absolutely! Simply shape the cake mixture into flattened bunny face forms by hand, insert sticks, and chill until firm before dipping. The mold helps with uniformity but isn't essential for success.
- → What's the best way to melt white chocolate for coating?
-
Melt in short 30-second bursts in the microwave, stirring thoroughly between each interval. This method prevents scorching and ensures smooth, evenly melted coating for dipping.
- → Can I freeze these treats for later?
-
Yes! Freeze undecorated cakesicles in a single layer, then transfer to a freezer-safe container. Thaw in the refrigerator before decorating with final touches to prevent moisture from affecting the coating.
- → What alternatives work for bunny decorations?
-
Fondant and modeling chocolate shape beautifully into ears and noses. Pretzel sticks make charming whiskers, while edible markers let you draw detailed faces. Candy eyes and sprinkles add instant personality and color.
- → How do I prevent the sticks from falling out?
-
Ensure the cake mixture is thoroughly chilled before inserting sticks. Press firmly into the center of each shape, then refrigerate again before dipping—this creates stability during the coating process.